Add or edit a user
Go to GLOBAL SETTINGS > USERS > New User. 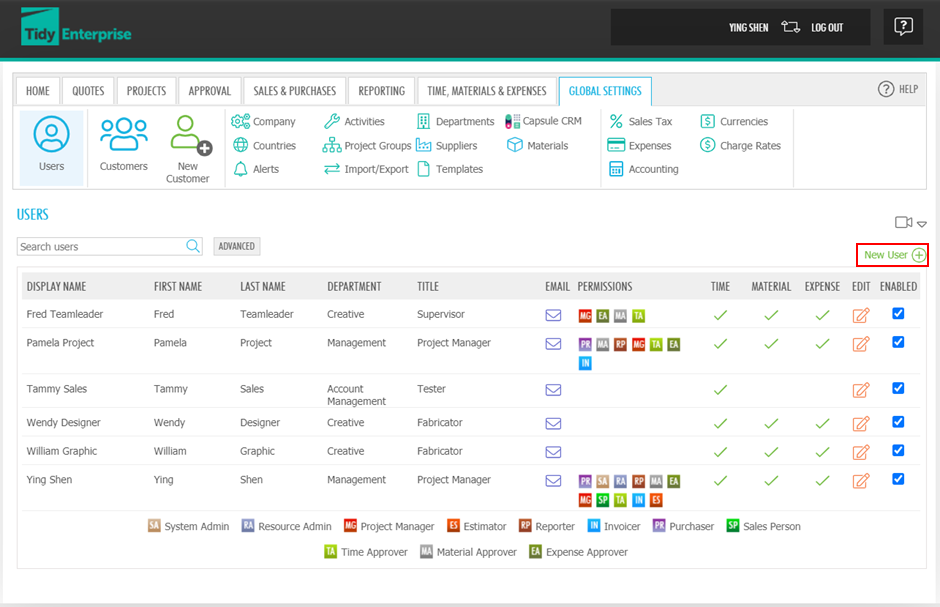
The NEW USER screen allows you to specify user login details, personal information (including the department created previously), and their role in the company.
Personal Information Tab
Login Type - Users can be assigned a Login ID and Password, but TidyEnterprise also offers the option of using major existing third-party accounts, such as a WindowsLive ID, Google or Facebook accounts.
Fill in the LOGIN DETAILS and PERSONAL DETAILS sections.
 Select the roles you want to assign to this user. Each user may have multiple roles. To understand each role, hover your mouse over the role name or read Global settings - Users - User roles.
The check box Allow API Access at the bottom of the screen will automatically generate an API token. API (Application Programming Interface) access will only be needed if an external application is used to access Tidy data. For more information, contact Tidy Support via the question mark icon at the bottom RHS of each screen.
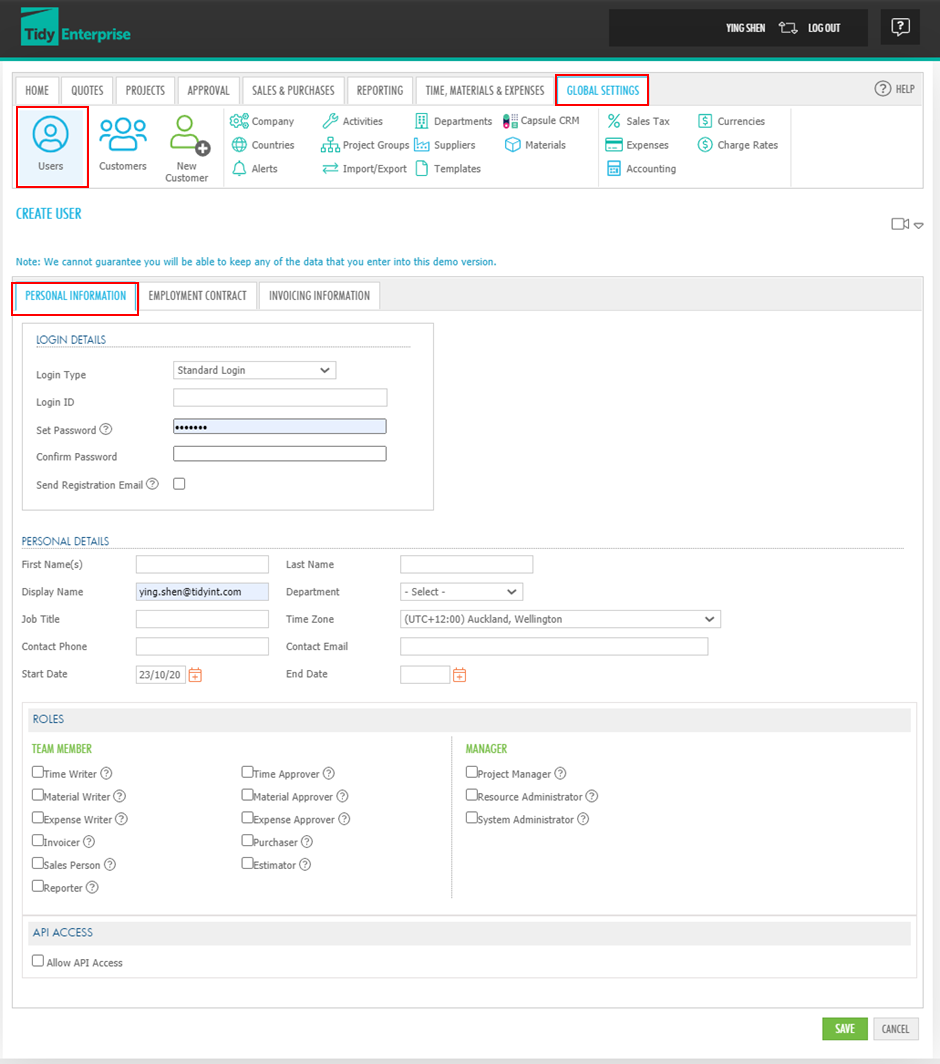
The Login ID, Set Password, Confirm Password, First Name(s), Last Name, Department and Contact Email are mandatory fields. To understand how to set up Departments, read Global settings - Departments..
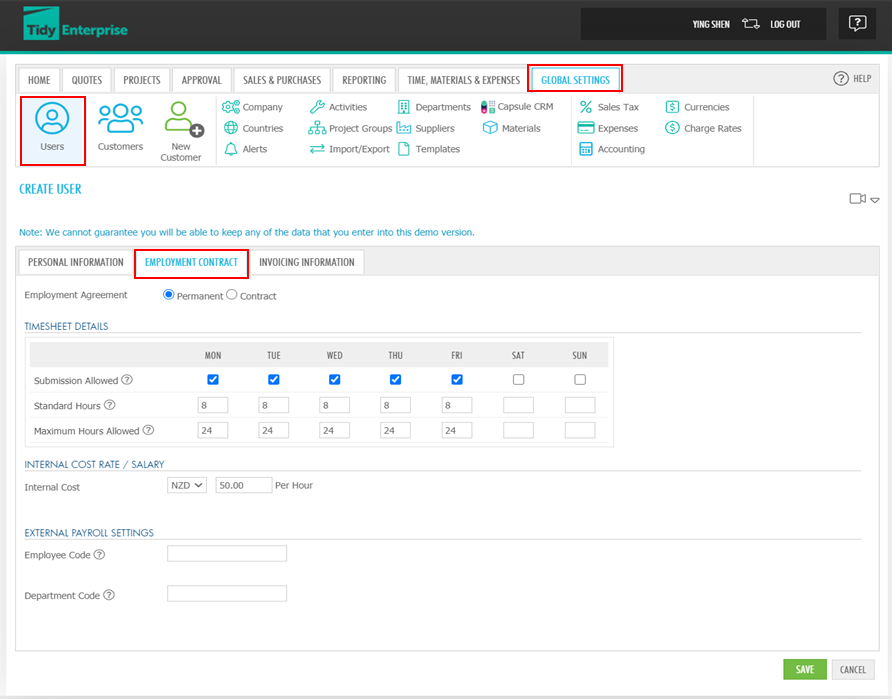
Employment Contract Tab
Select the employment contract type for this user and enter the TIMESHEET DETAILS. Enter the rate for this user. If youve connected to a 3rd party payroll app, then you can enter the Employee Code and Department Code to map to the employee to the connected system. Click Save.

Invoicing Information Tab
Select the charge rate that applies to this user or create a new rate that only applies to this user.
Actions on Behalf
If you have the Resource Administrator role, you will see the Actions on Behalf tab within the edit user screen.
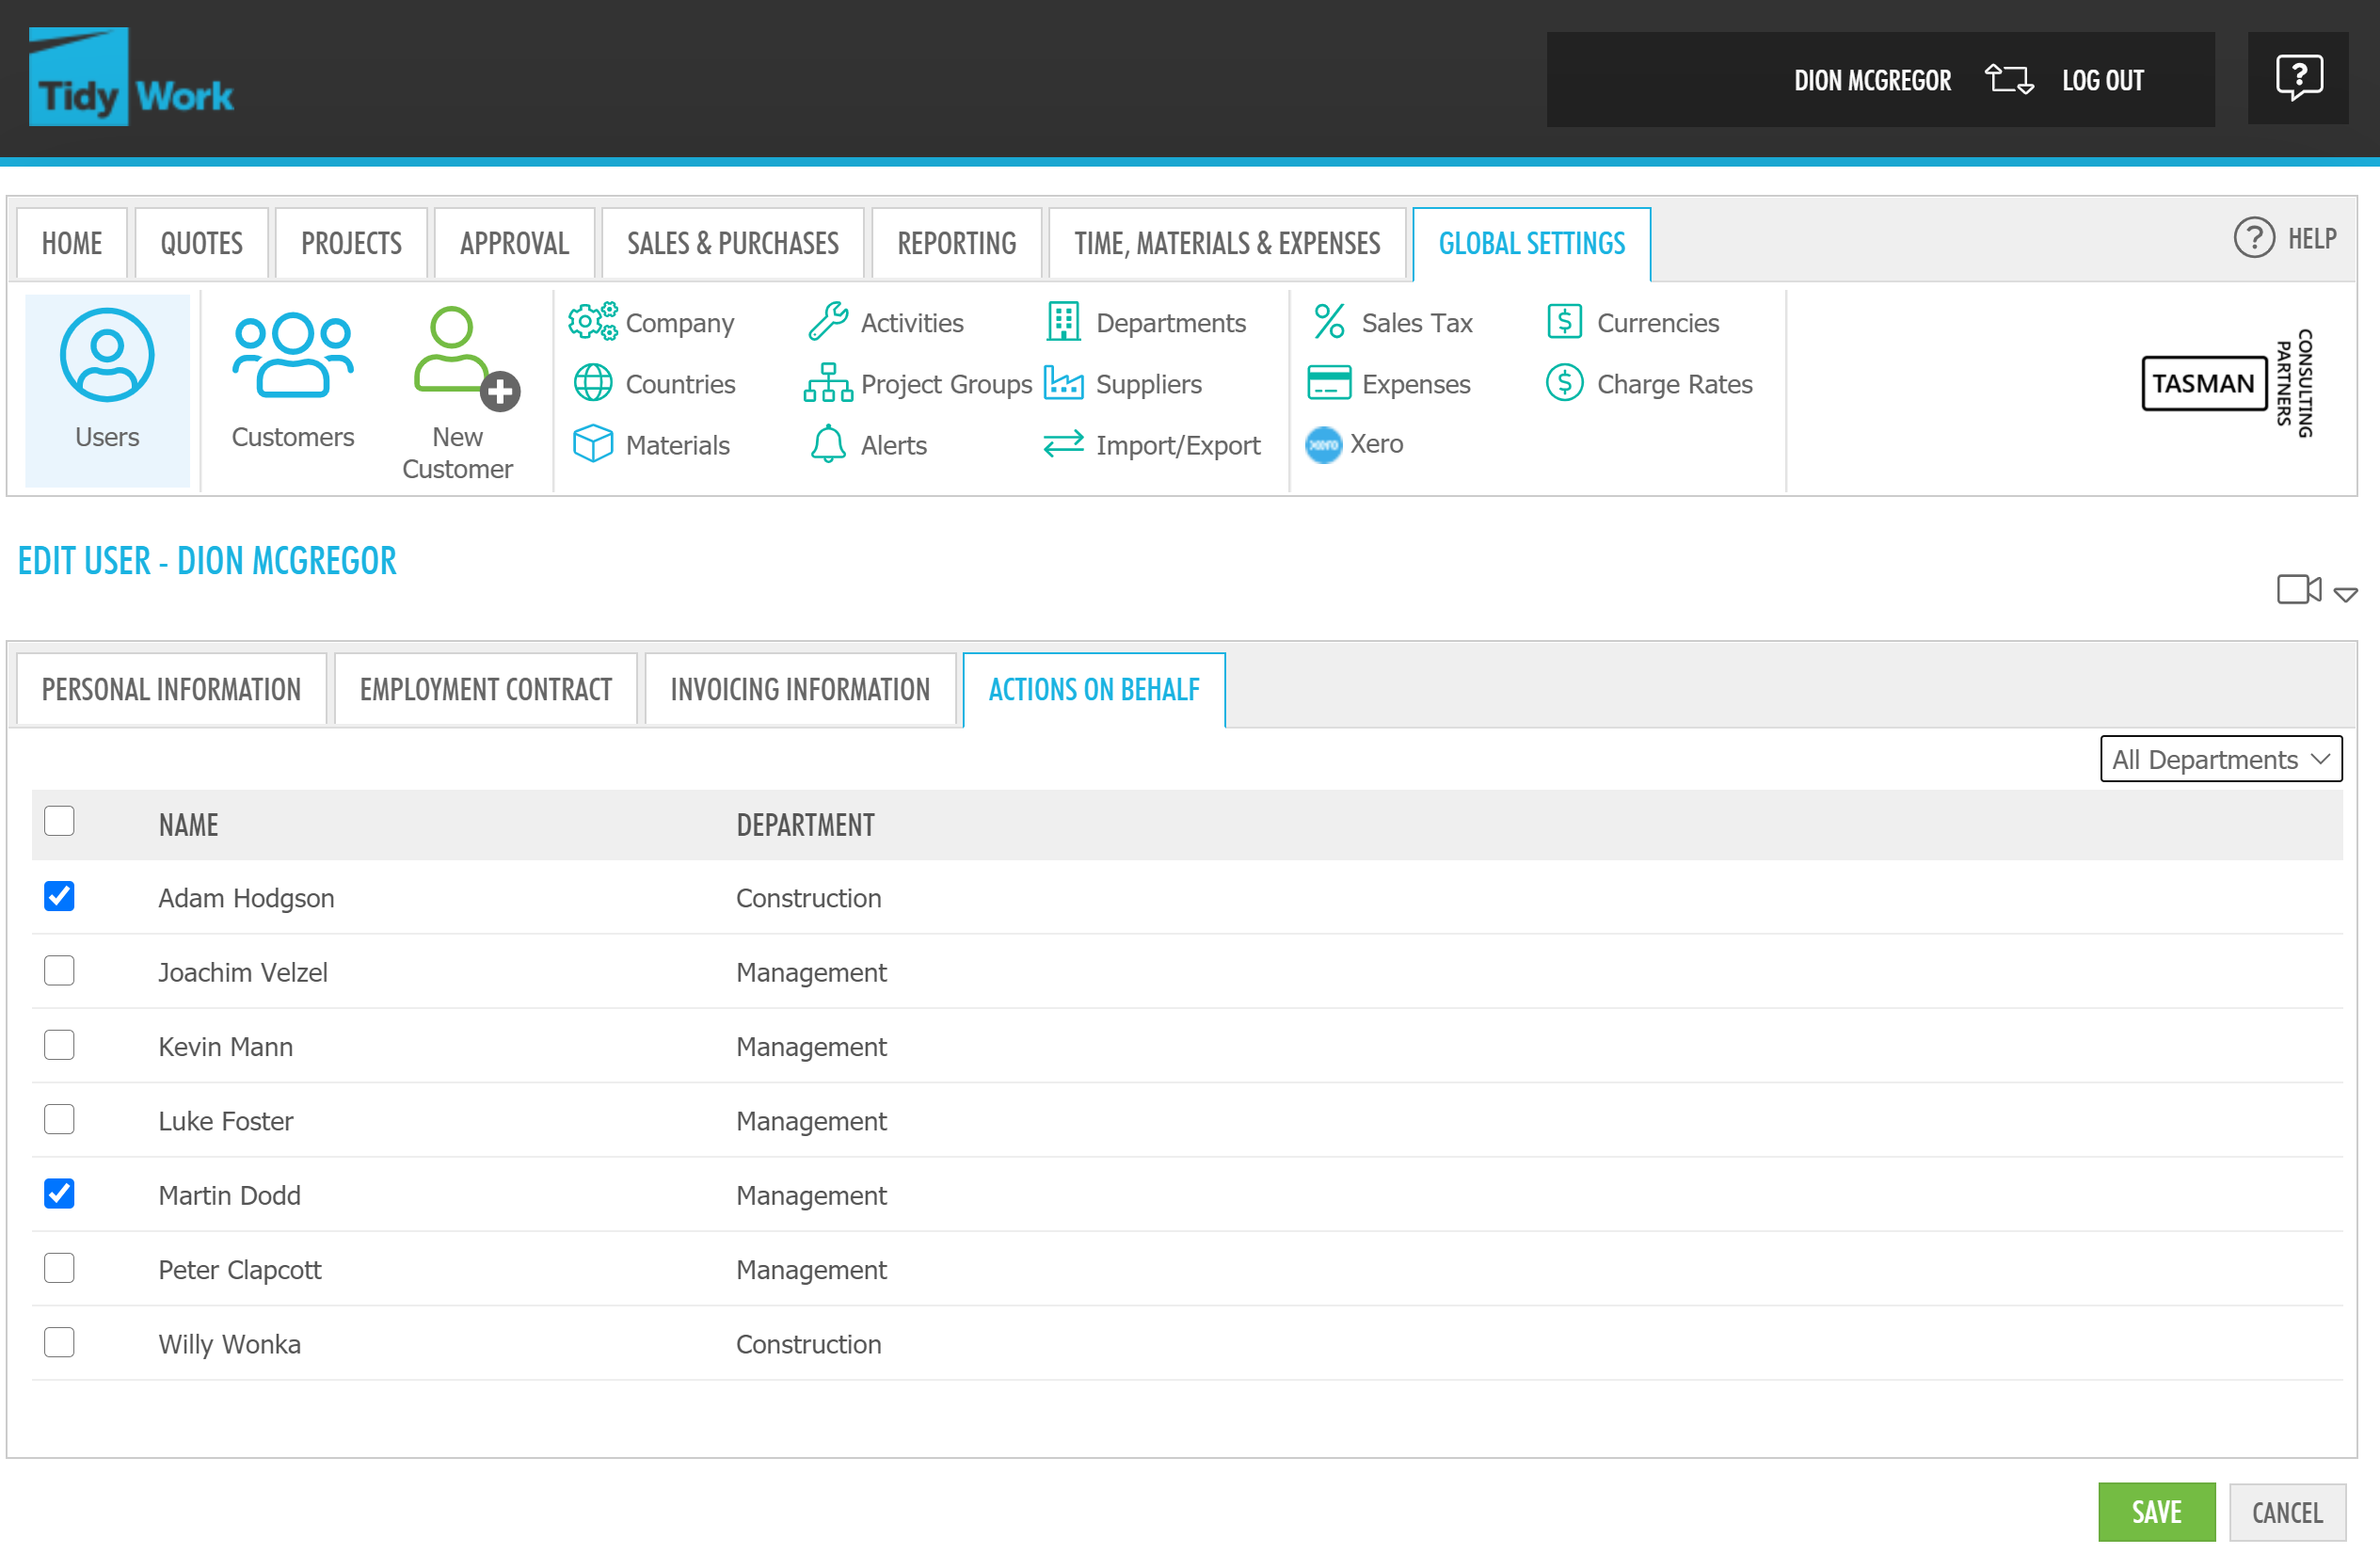
This screen is where you can give permission to enable users to act on behalf of another user within your Tidy environment. To learn more about Actions on Behalf in TidyEnterprise, read Global settings - Users - Actions on behalf.
 Finally, click SAVE to create the user, viewable on the USERS screen. If you want to change the users information, click beside their name.
